Installation Instructions
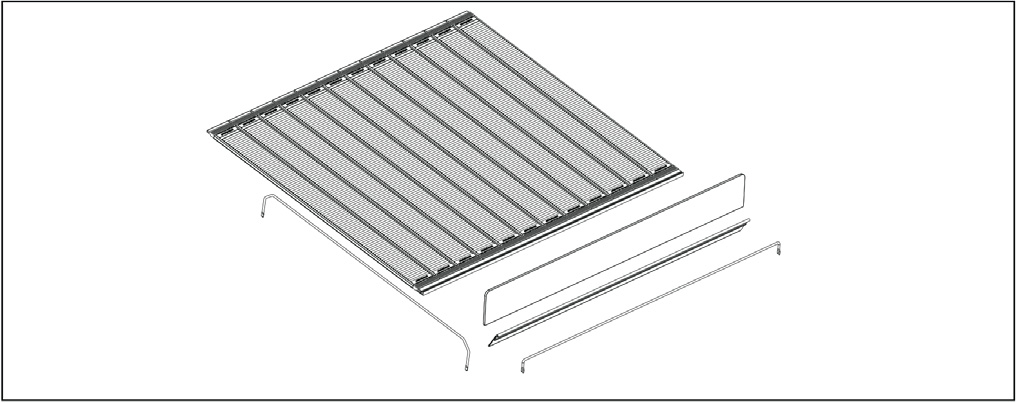
1. Remove parts from the shipping package and check contents to confirm you have: MiniRoller mat, Acrylic front stop, dividers, and any optional items on the packing slip.

2. Slide the acrylic front stop into the front channel of the MiniRoller mat.
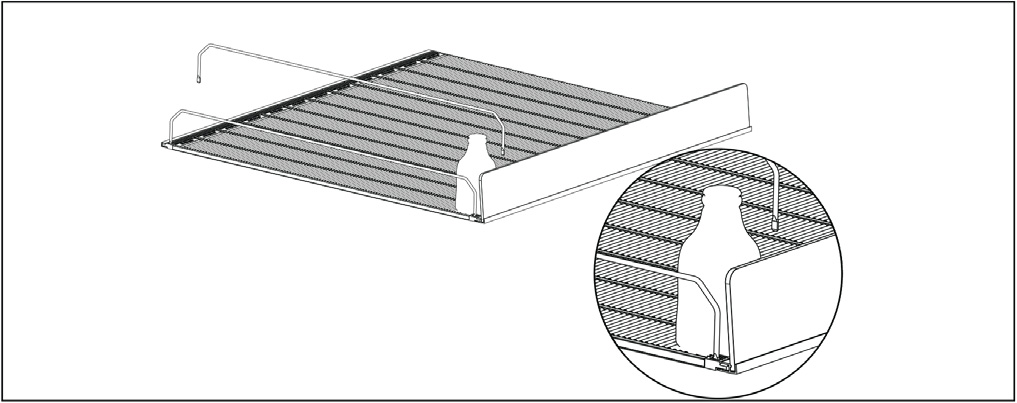
3. Install one divider on the left side. Place one SKU of your planogram on the mat and install the next divider to the right of the product.
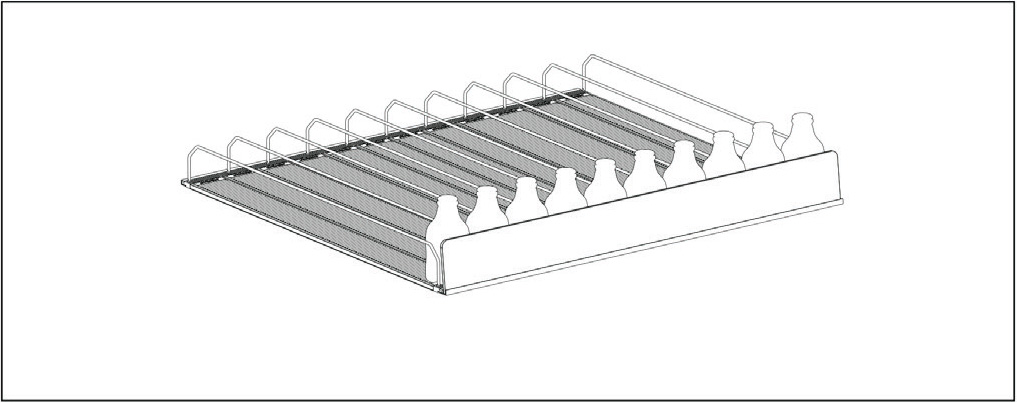
4. Continue placing product and dividers to create lanes for the rest of your planogram. Be sure to place all dividers into the same slot numbers on the MiniRoller mat.
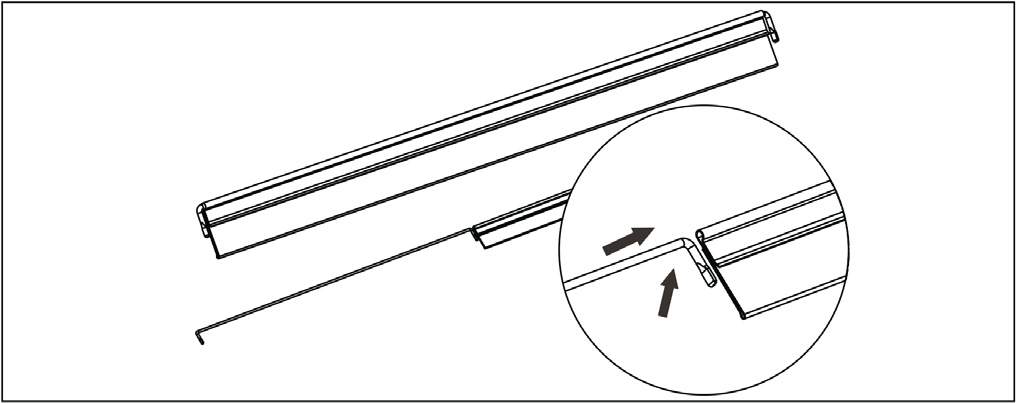
5. If purchased as an option, assemble the rear planogram sleeve by sliding onto the rear stop.
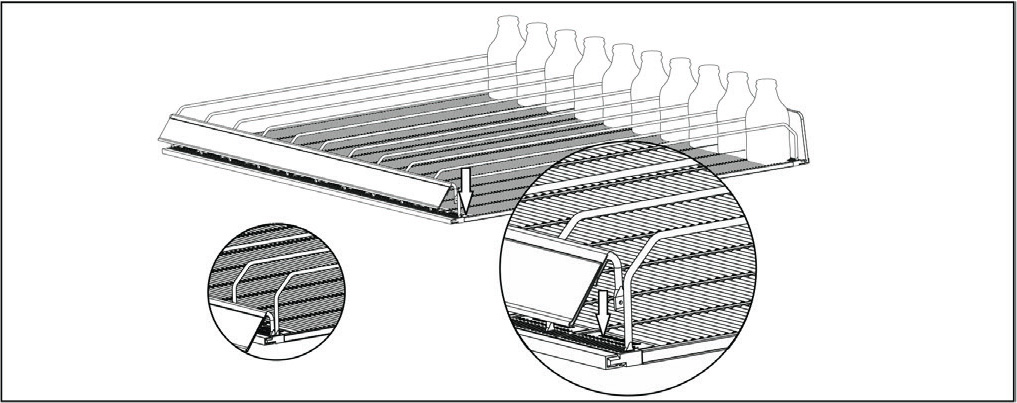
6. Install the resr planogram sleeve in the slots next to the wire lane dividers as shown.
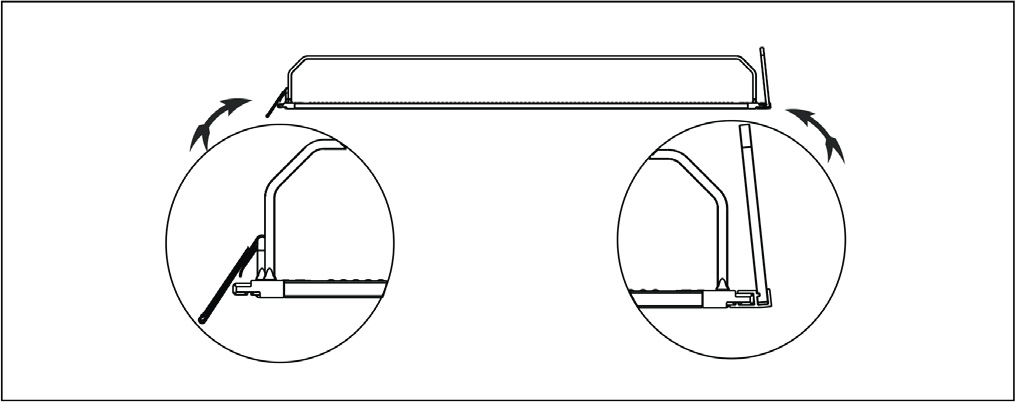
7. If purchased as an option, insert the rear stop as shown.
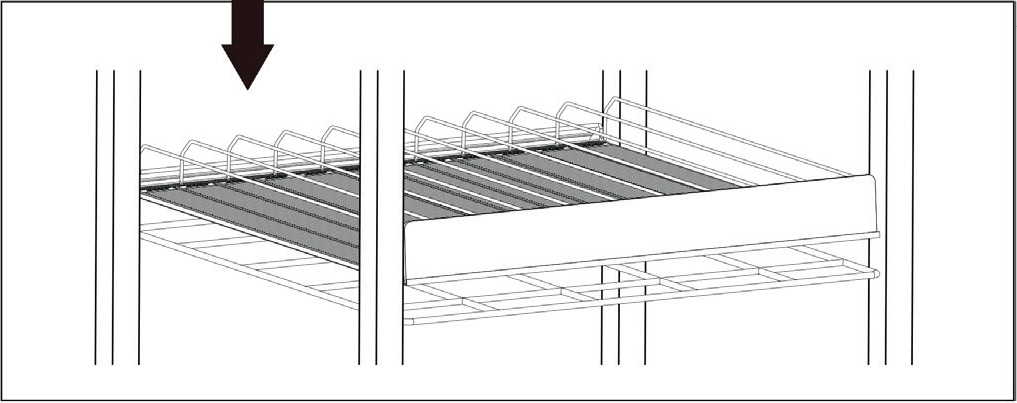
8. Remove product and set MiniRoller on the wire shelf at the desired angle. Adjust the angle by adjusting the riser at the back.
